Have you ever found yourself walking home from somewhere and thinking “damn, it’s really freakin’ nice out today”? This is usually followed by taking some photographs of your surroundings like an awe-struck tourist. But sometimes, a photo just isn’t enough. I know your inner-artist wants to draw what you see.
You’d better comply, you know. It’s unwise to get on an artist’s bad side. They’ll throw paint at you, and paint stains.
I rarely draw real environments, sothis is somewhat of an experiment. Am I setting myself up for disaster? Definitely. Of course not. Art is subjective, right? Yeah, let’s go with that.
As I journeyed home from the subway station with an overpriced Starbucks coffee in hand, I grabbed a few photos of the messy, busy, drenched street I was on. If it hadn’t rained ten minutes beforehand, these photos would be boring. But when the road turns into a wet mirror, it actually looks really cool.
1. Pick Your Favourite
Using: layers, move and transform tools
In preparation for drawing your touristy digital painting using your touristy photo, choose one and bring it into Photoshop either by copy and pasting it directly, or by going to File >> Place. While I like the middle photo, I’m going to be drawing the image on the far right simply because it has a streetcar in it.
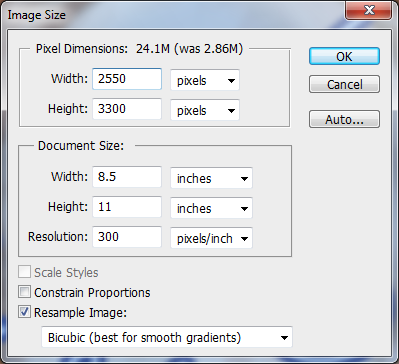
Set up your canvas so you have your reference photo on one layer, and a blank one above it. By using the move tool (hotkey V), you can resize the reference to your liking , and move it to wherever you want on the canvas. If you want to hide the reference at any point, click the eye icon to the left of the layer it’s on.
2. Sketching Perspective
Using: the brush tool and/or line tool
Time to put all those elementary school art classes to good use! I can’t be the only one that was forced to draw pictures of roads and houses that tapered off into the distance.
Sketch out the basic lines that form your scene. Ignore all of the little details. Pay attention to the horizon line (where the road stops), the sidewalks, and the general direction and shape of where everything is angled.
You can make this outline by using the brush tool asI have, or if you want to be very precise, use the line tool. You can access the line tool by left-clicking and holding, or right clicking the shape tool icon on the toolbar.
You can draw lines by clicking and dragging on the canvas, but to make sure the line is solid the moment you create it, make sure the Fill Pixels option is selected at the top of the window, as shown below:
The other two options will turn the line into a path layer or a shape – don’t worry about these right now, we don’t want either of them.
3. Apply the Background Colour
Using: the gradient tool
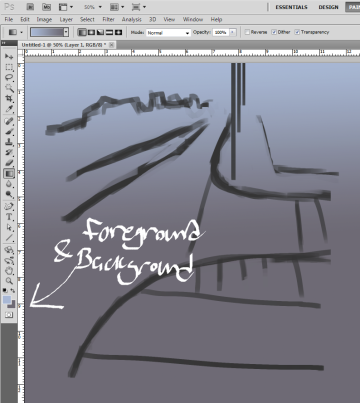
When painting a scene like this with a full background, I highly recommend applying a background gradient on a separate layer so you have a starting point to base the rest of your drawing around. Select the gradient tool (G) and select two appropriate foreground and background colours to match the feel of your scene. Here I chose blue for the top (foreground), and a greyish purple for the bottom (background).
4. Build Away
Using: the brush tool, eraser tool
Using the initial sketch as a guide, start to fill in the details using the brush tool. As I continued colouring and refining the buildings, I noticed that the perspective was completely off. Thankfully, since all the structures were on a separate layer, all I had to do was grab the eraser tool and drag it across the parts of the buildings that I didn’t need. From there, just detail until you feel like stopping.
5. Make it Rain – Reflections
Using: the brush tool, eraser tool, lasso tool, move/transform tool, layer properties
Since I took my reference image in the rain, every single light that appears in the photo will have a reflection. Every headlight, every streetlamp, and even the dim light of the sky casts a reflection on the road. Why did I pick such a complicated picture, again?
Before we add pretty lights, I’ll show you a technique that you can use to cast reflections. Using the lasso tool (L), roughly outline the streetcar and the car separately. Now, copy and paste it, then select the move tool (V) and drag the top of the dotted box that appears downwards, so the selection flips on the x axis. To fade the reflection, lower the opacity below 50% on the layer properties panel. You’ll now have a rough reflection, but you can take the eraser tool (using a brush with faded edges) and erase an edge to make it look more natural. I’ll use this technique for the streetcar and car only, since they’re more detailed than anything else in the image. Take the screenshot below as an example.
The reflection from the sky can be done just by using the brush tool. Pay close attention to the details in the picture to see where the road has a blue glow, and mimic it. This is also a good time to add some depth to the sky itself.
6. Make it Rain – Lights
Using: the brush tool (square and soft round)
Drawing the lights will brighten this image quite a bit. I’ll be using the square brush for harder accents of light and the soft round brush for a really faded, soft looking light. Using a bright colour with the soft brush will really make an area of your drawing shine brightly. Keep going over the lights, using whichever brush you prefer to achieve the desired effect (I used the square brush for most parts), and then the scene is complete!
If the world were a children’s colouring book, I think this is what it would look like.


toveen
/ November 15, 2012Ahhh! This is so useful! I’m absolutely awful at backgrounds so thank you for this guide! It’s spectacular ;A;
lklamot
/ November 16, 2012I know eh, backgrounds just exist to make our lives harder :C I’m glad you think it’s useful!